Models and floor plans to renders
Turn a model screenshot or a floor-plan image into a design concept. These walkthroughs cover the input, the Studio tool, an example prompt and what to inspect.
The comparisons below are illustrative images made with Image Gen outside Studio. They show a visual direction, not a guaranteed result from a particular Studio model.
Render an exterior model view
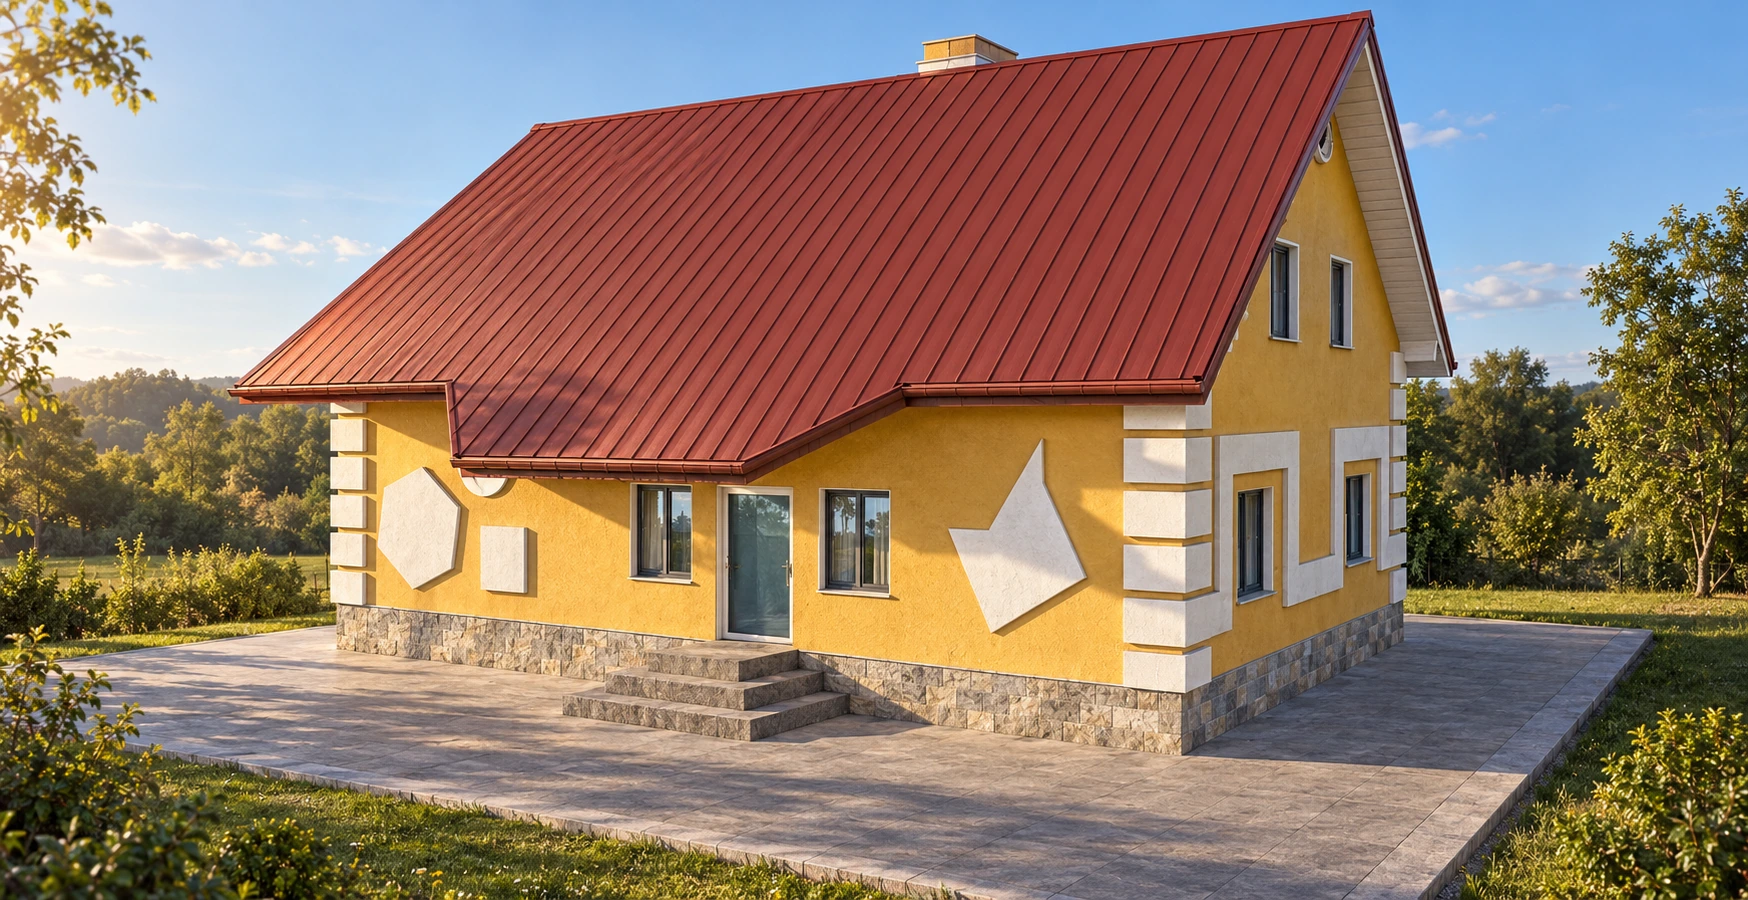
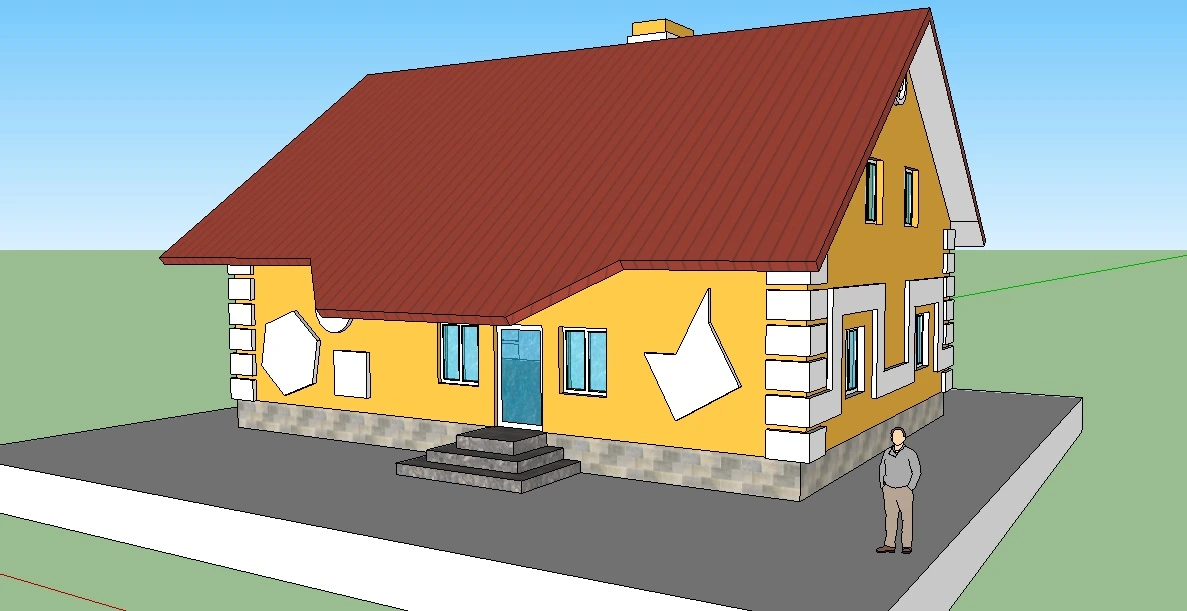
SketchUp source: sXe_92, public domain. Source.
- Export a clear view from your modelling application. Keep the full building visible and hide axes, selection outlines and toolbars.
- Open Photo tools, then Custom prompt. Upload the image and keep Edit photo selected.
- Describe the materials and lighting you want, and name the geometry and camera that must stay. Choose a model and size, review the credit quote, then generate.
Example prompt
Render this building design photorealistically. Preserve the camera, roof, facade and openings. Add natural late-afternoon sunlight, rich cast shadows and realistic materials.
Before you keep it: Compare the roof silhouette, eaves, doors, windows and entry steps. Better textures do not make a changed floor level or opening acceptable.
Open this tool in Studio →Render an interior model view
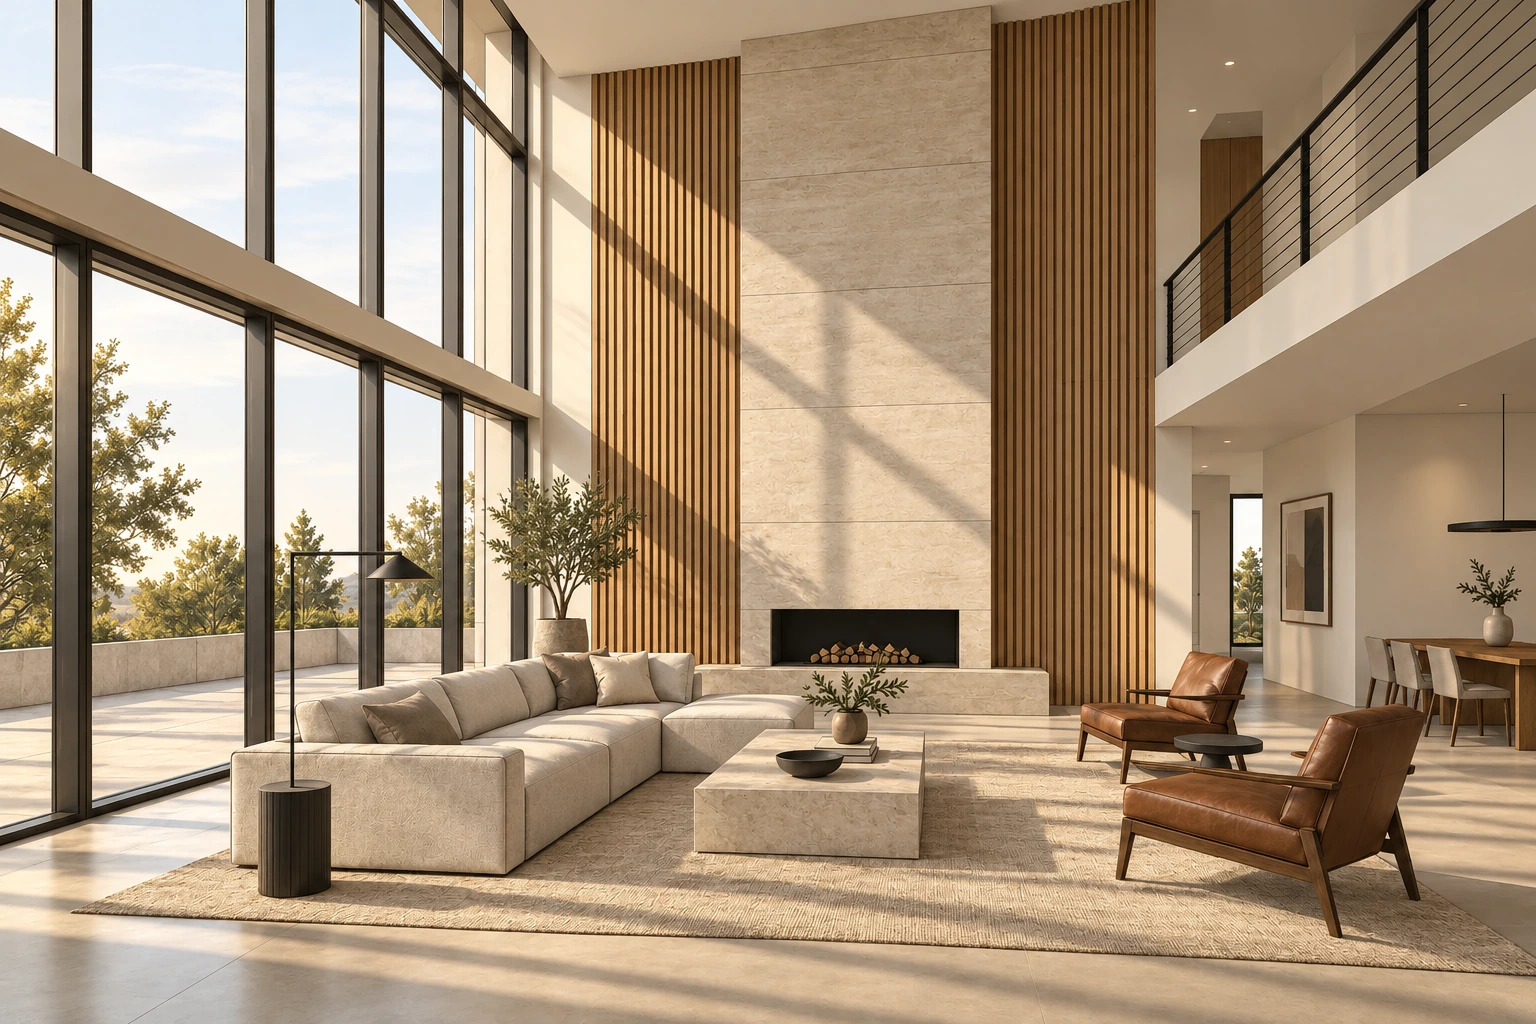
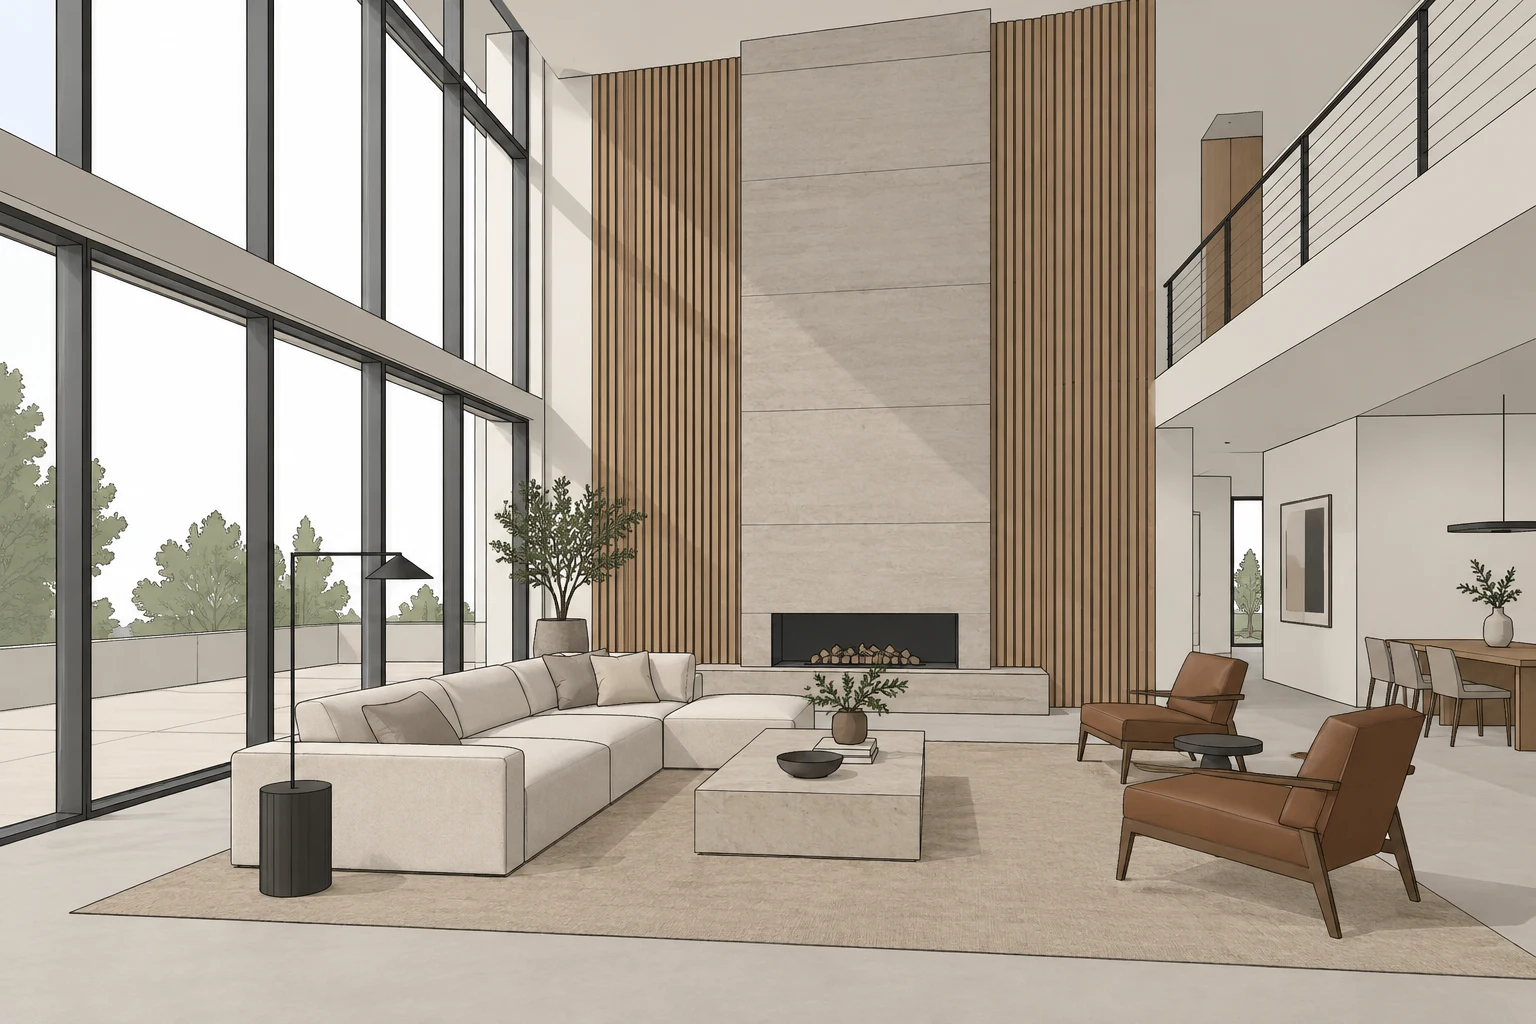
- Export the interior from the camera angle you want in the result. Show the furniture and architecture you want preserved.
- Open Custom prompt, upload the model view and use Edit photo.
- Name the light direction, finishes and furniture constraints. Choose the model and output size before reviewing the quote and generating.
Example prompt
Render this interior model photorealistically. Keep the same camera, architecture and furniture. Add sunlight through the glazing, strong window shadows, indirect lighting and detailed materials.
Before you keep it: Check window divisions, ceiling height, furniture count and placement. Look for bent edges, floating furniture and conflicting shadow directions.
Open this tool in Studio →Make a furnished floor-plan view
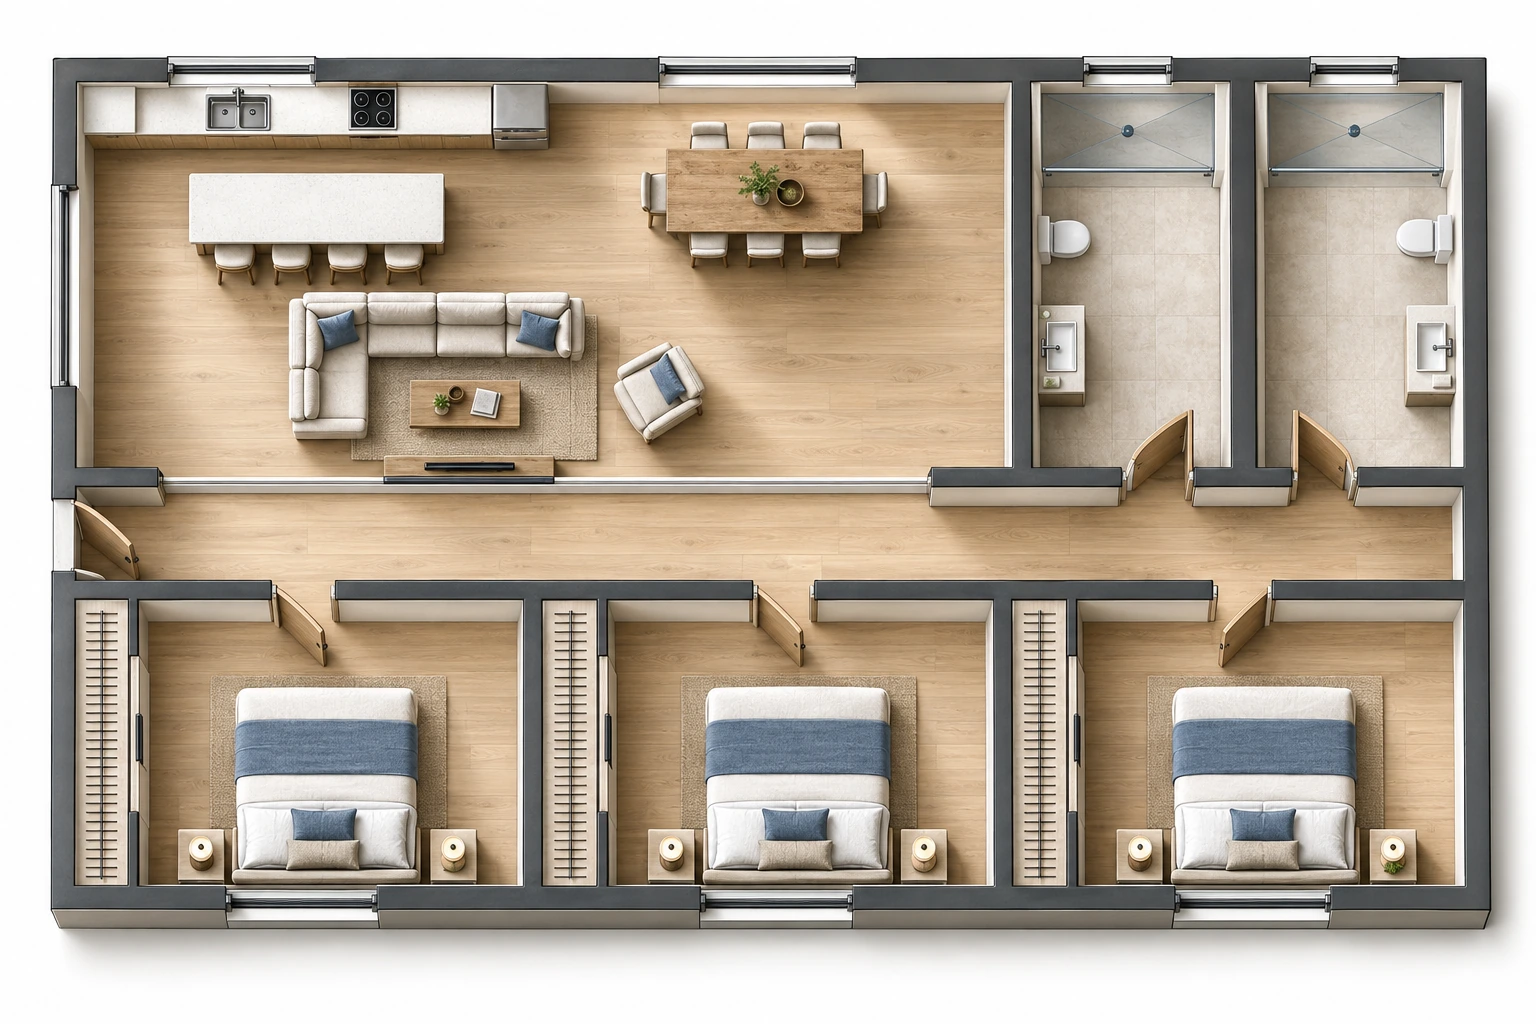
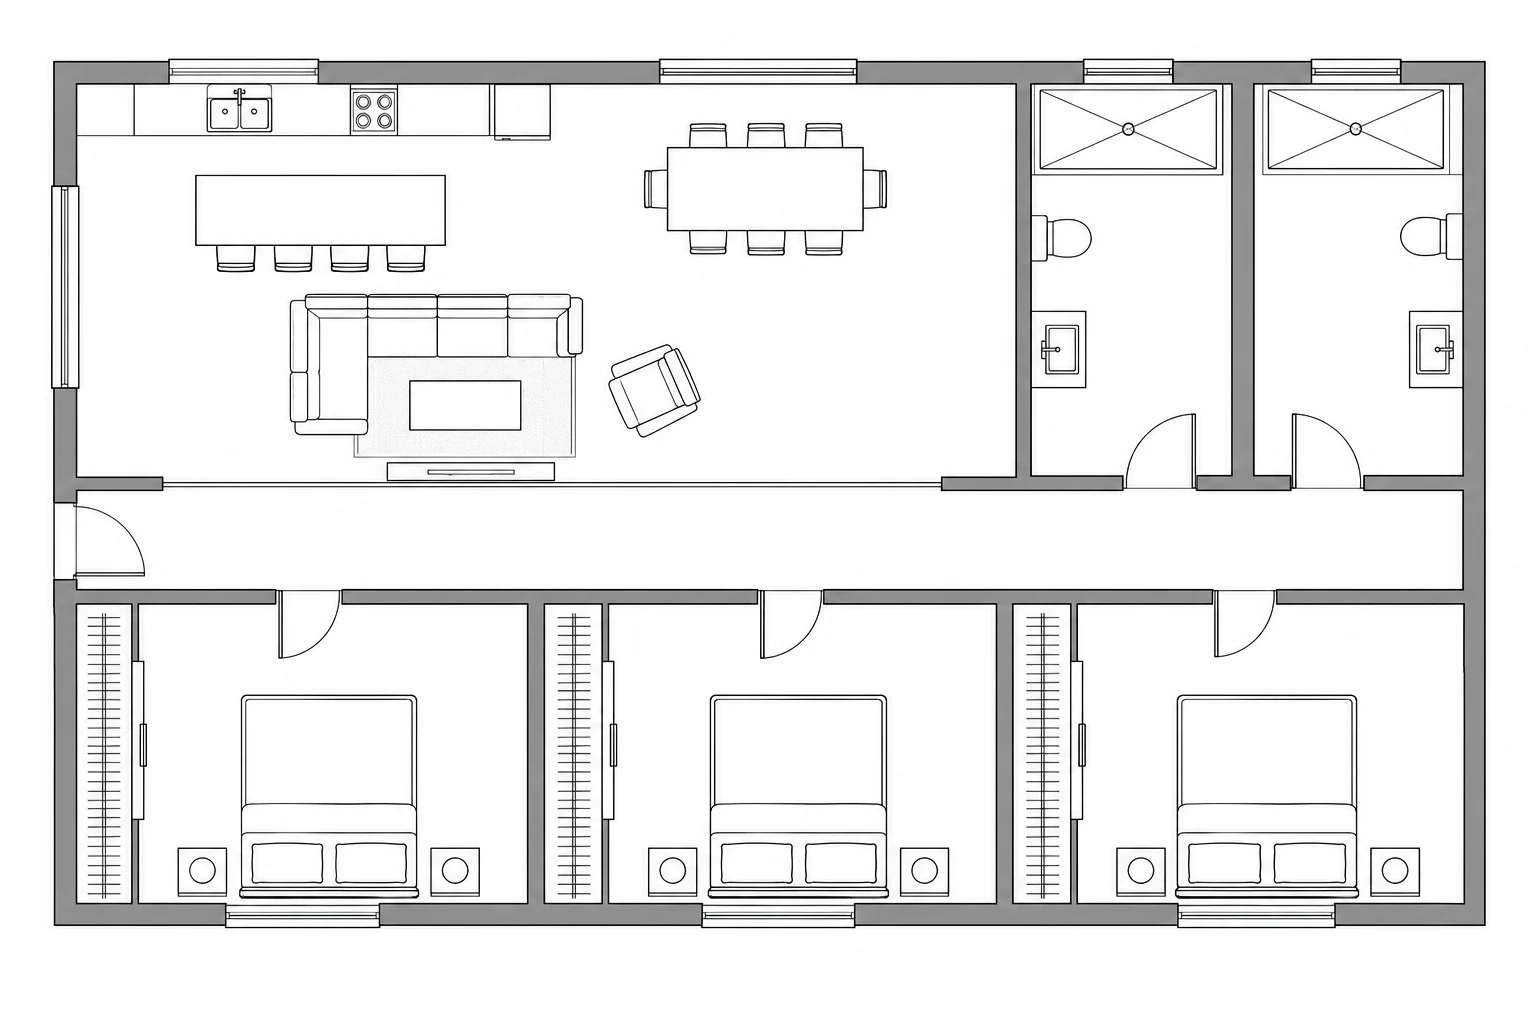
- Export a legible floor-plan image with the entire layout, including doors and windows.
- Open Floor plan to furnished view under Photo tools. Upload the image and choose Top-down or Three-quarter in Task options, then choose a style.
- Add any layout or furnishing constraints, select a model and size, and review the quote before generating.
Example prompt
Keep the orientation, walls, doors, windows and room layout unchanged. Use warm oak floors, neutral finishes and clear circulation paths. Do not add rooms, dimensions or labels.
Before you keep it: Count the rooms and inspect every opening, circulation route and furniture position. This is a design concept, not a measured or construction-ready drawing.
Open this tool in Studio →Improve light without losing the design
- Describe one lighting direction, such as afternoon sun from the left, rather than combining conflicting times of day.
- Name materials precisely: honed limestone, oak grain, linen upholstery or standing-seam metal. Avoid relying only on words such as realistic or luxury.
- Keep a copy of your source. If geometry changes, revise the brief or model and inspect the next result again. A preservation instruction is a request, not a guarantee.